
AirPods make everyday listening easy. You can wear them during a commute, a workout, a work session, or a quiet evening at home. The problem is that one playlist can turn into several hours of listening without a real break.
The 60-60 rule for AirPods offers a simple way to keep that habit under control. The idea is easy to remember. Keep the volume at no more than 60% of the maximum level, then take a break after about 60 minutes.
It sounds basic, but it can make a real difference. Many people do not notice how often they raise the volume during a long session. Your ears slowly adjust to loud audio, so a level that felt strong at first can start to feel normal.
The rule gives you a practical starting point. Still, it should not replace the hearing safety tools built into the iPhone. Those tools can show estimated sound levels, track exposure, and reduce audio that passes a chosen decibel limit.
What Is the 60-60 Rule for AirPods?
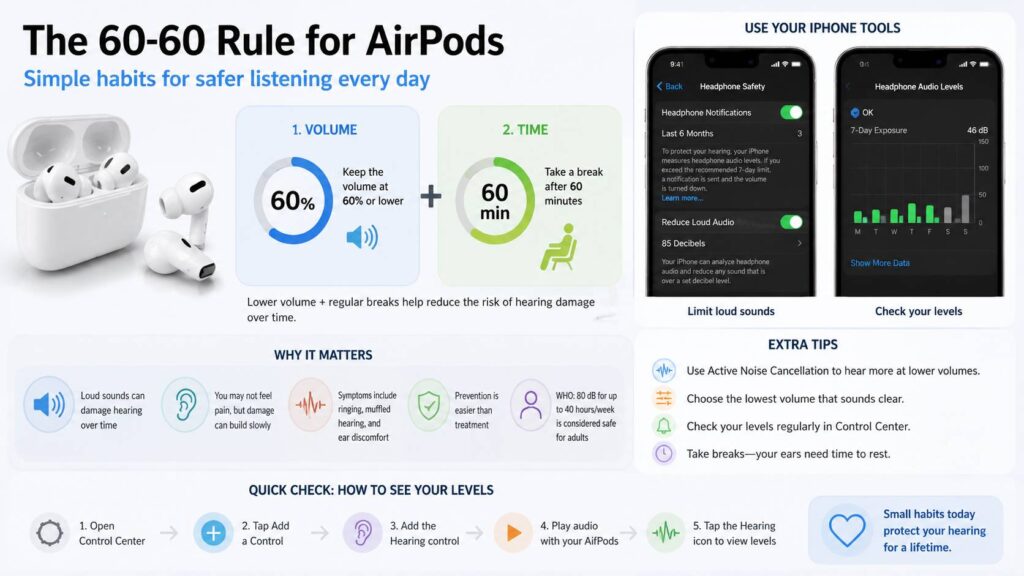
The 60-60 rule has two simple parts:
- Keep your AirPods volume at 60% or lower.
- Take a listening break after 60 minutes.
The break does not need to last for an hour. A few quiet minutes can help your ears recover and reset your sense of volume.
The 60% figure should act as a limit, not a target. You do not need to raise the volume to 60% when you can hear clearly at 35% or 40%. Lower levels are often enough in a quiet room.
The rule applies to music, podcasts, audiobooks, videos, games, and calls. Total listening time matters. Your ears do not treat a podcast differently from a song when both play at a high sound level.
Is the 60-60 Rule an Apple Setting?
No. Apple does not include a feature named the 60-60 rule in the AirPods or iPhone settings.
The rule is a common listening guideline for headphones and earbuds. It works with AirPods, Beats, wired headphones, and products from other brands.
Apple uses a more detailed system. The iPhone can estimate headphone audio levels in decibels. It can track your listening history, send loud audio alerts, and lower audio that passes a limit you select.
This data gives you a clearer picture than the volume slider alone. A 60% setting does not produce the same sound level in every situation. The result can change with the AirPods model, app, recording, equalizer, ear tip seal, and background noise.
My honest view is that the 60-60 rule works best as a reminder. The iPhone’s decibel readings provide more useful information for daily listening.
Why Loud AirPods Listening Can Damage Hearing
Hearing risk comes from sound level and exposure time. Louder audio allows less safe listening time. Lower audio levels allow longer sessions.
Your ears may not warn you right away. Loud sound can feel comfortable after several minutes. This can tempt you to increase the volume again, especially in a noisy place.
Possible warning signs include:
- Ringing or buzzing in the ears
- Muffled hearing after removing your AirPods
- Trouble hearing speech in a crowded room
- Ear discomfort after a long session
- A need to use higher volume than before
- Increased sensitivity to normal sounds
These symptoms can fade after a short period. Repeated symptoms still deserve attention. Persistent ringing, pain, or hearing changes should be checked by a qualified hearing professional.
Is 60% Volume Safe for AirPods?
A 60% volume level is not guaranteed to be safe in every situation.
A quiet podcast and a heavily compressed song can play at different sound levels, even with the slider in the same position. One streaming app can sound louder than another. A loose earbud fit can make you raise the volume to hear speech clearly.
Background noise creates another problem. Many people turn up their AirPods on trains, planes, buses, busy streets, and in crowded gyms. They often forget to lower the sound after leaving that noisy place.
Treat 60% as a rough ceiling. Pick the lowest volume that still sounds clear and enjoyable. In a quiet room, this may sit far below 60%.
A live decibel reading gives you better information than a percentage. It shows the estimated sound level reaching your ears during actual playback.
How to Check AirPods Decibel Levels on an iPhone
The Hearing control in the iPhone Control Center can display estimated AirPods sound levels in real time.
Use these steps:
- Open Control Center.
- Tap the Add button.
- Select Add a Control.
- Add the Hearing control.
- Connect your AirPods and start playing audio.
- Open Control Center and tap the ear-shaped Hearing icon.
You will see the current headphone level in decibels. Check the reading during louder parts of a song or video. An intro may sound quiet, then the chorus or action scene can jump to a much higher level.
You can review previous exposure in the Health app:
- Open the Health app.
- Tap Search.
- Select Hearing.
- Tap Headphone Audio Levels.
This history can help you spot patterns. Your home listening may stay moderate, but commuting, exercise, or gaming sessions may raise your weekly exposure.
How to Limit Maximum AirPods Volume
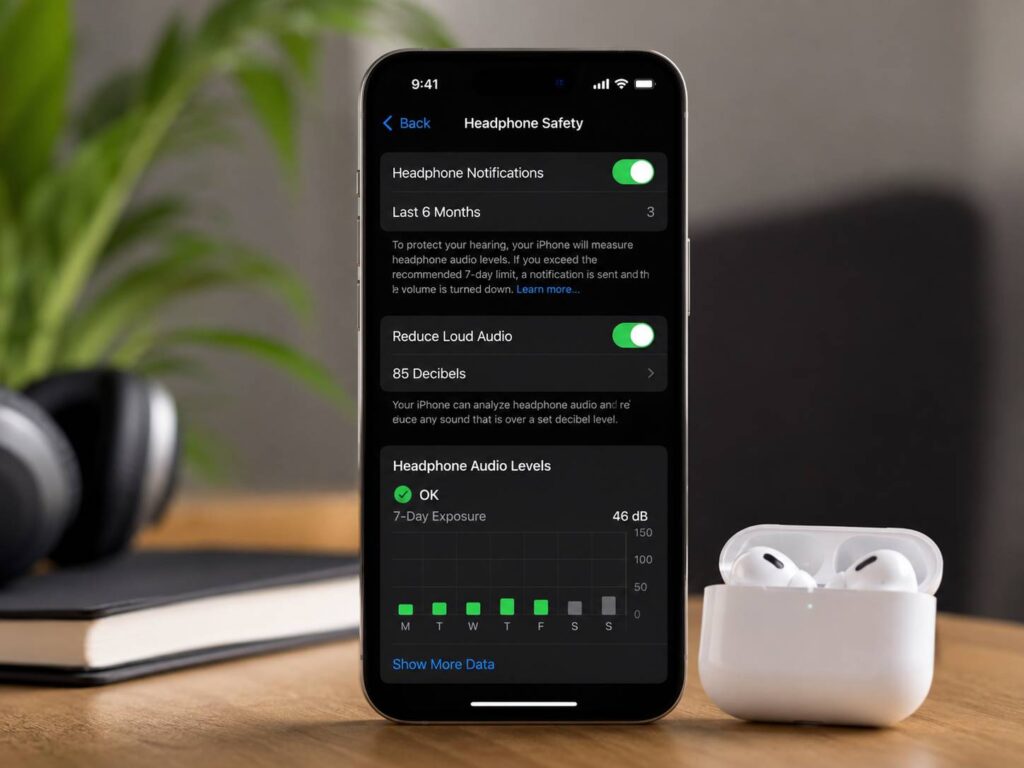
The Reduce Loud Audio setting can lower headphone sounds that pass a selected decibel level.
To turn it on:
- Open Settings.
- Tap Sounds & Haptics.
- Select Headphone Safety.
- Turn on Reduce Loud Audio.
- Choose a decibel limit.
This setting is more practical than trying to keep the volume slider in the same position all day. It analyzes headphone audio and reduces sounds that pass your selected threshold.
A volume limit does not remove the need for breaks. Long sessions can still feel tiring, even at a moderate level. The 60-minute break remains a useful habit.
How Headphone Notifications Work
The iPhone can send a Headphone Notification after it detects a period of loud listening. The system may lower your volume the next time you connect headphones.
These alerts can help, but you should not rely on them as your only warning. It is better to check your sound level before a long session.
Pay close attention after entering a noisy place. You may raise the volume without thinking about it. Check it again after you move somewhere quieter.
This small habit can prevent a temporary volume change from becoming your normal setting.
Can Noise Cancellation Help Protect Hearing?
Active Noise Cancellation can make audio easier to hear at a lower volume. It reduces outside noise, so you do not need to overpower traffic, engine sounds, conversations, or gym music.
This is one of the most useful AirPods features for safer listening. A podcast may sound unclear on a train with noise control turned off. Switch on Active Noise Cancellation, and the voices may become clear without increasing the volume.
Noise cancellation does not make loud audio safe. You still need to check the volume and listening time.
Use Transparency mode near traffic, public announcements, alarms, or other situations where awareness matters. In some places, removing one earbud is the safer choice.
Does the Rule Apply to Every AirPods Model?
Yes. The 60-60 rule applies to standard AirPods, AirPods Pro, and AirPods Max.
The experience can change between models. AirPods Pro use silicone ear tips that create a tighter seal. AirPods Max cover the ears and block more outside sound. Standard AirPods use a more open design.
A stronger seal can help you hear details at a lower level. Poorly fitted earbuds can have the opposite effect. You may turn up the sound to compensate for audio leaking out.
None of the models are automatically safe at high volume. Fit, sound level, and session length still matter more than the product name.
Does Custom EQ Change Safe Listening Levels?
Equalizer settings can change how loud certain parts of your music feel. Boosted bass, stronger treble, or raised vocal frequencies can make a track sound more intense without a major change to the volume slider.
This becomes more relevant as Apple expands audio controls. Our guide to AirPods custom EQ in iOS 27 explains how more detailed sound adjustments may change the way people tune their listening experience.
A custom EQ should improve clarity, not push every frequency higher. Good tuning may help you hear vocals or instruments at a lower overall volume.
After changing an equalizer setting, check the live decibel reading again. Do not assume the same slider position produces the same exposure.
A Practical AirPods Listening Routine
The 60-60 rule works better as part of a simple daily routine.
Try these habits:
- Start below 50% volume in a quiet room.
- Raise it only when the audio is hard to understand.
- Use noise cancellation in loud places.
- Check the Hearing control during longer sessions.
- Take a quiet break after about one hour.
- Lower the sound after leaving a noisy area.
- Review Headphone Audio Levels each week.
- Turn on Reduce Loud Audio.
- Stop listening after ringing or muffled hearing appears.
You do not need to obsess over every minute or decibel. The goal is to avoid long periods of loud audio and catch bad habits early.
Common Mistakes With the 60-60 Rule
One common mistake is treating 60% as the recommended listening level. It is a suggested maximum. A lower setting is better when the audio remains clear.
Another mistake is taking a break, then returning at a higher volume. Quiet time can make the old level feel less exciting for a moment. Give your ears time to adjust before raising it.
Some listeners count music sessions but ignore videos, calls, games, and social media. All headphone audio contributes to total exposure.
Others trust comfort alone. Loud sound can feel normal after your ears adjust. The decibel meter gives you a more dependable check.
Should Children Use the Same Rule?
Children need stricter volume limits and closer supervision. They may not notice or explain ringing, muffled hearing, or discomfort clearly.
Parents can turn on Reduce Loud Audio and use Screen Time controls to stop changes to the volume limit. Shorter sessions and regular breaks are sensible too.
Fit matters. AirPods that sit loosely may cause a child to raise the volume. Some families may find volume-limited over-ear headphones easier to manage.
Listening in a shared room gives parents a chance to notice habits. A child who constantly raises the volume may need a better fit, a quieter space, or a hearing check.
When Should You Get Your Hearing Checked?
Arrange a hearing check when ringing, muffled sound, pain, or sound sensitivity keeps returning after AirPods use.
Seek medical care quickly after sudden hearing loss, severe dizziness, strong ear pain, or a major change in one ear. Do not wait for those symptoms to clear on their own.
AirPods hearing tools can provide useful information on supported devices and in supported regions. They do not replace a professional assessment for ongoing or sudden symptoms.
Is the 60-60 Rule Worth Following?
Yes. The 60-60 rule for AirPods is simple, free, and easy to use. It encourages two useful habits, lower volume and regular breaks.
The rule is not a precise safety formula. Volume percentages vary, and different recordings can produce different sound levels. Apple’s Headphone Safety tools give you a better view of real exposure.
The best routine combines both methods. Keep the sound below 60%, use lower levels whenever possible, and take a break after about an hour. Check the decibel reading during long sessions. Use noise cancellation instead of fighting outside sound with more volume.
Good audio should remain comfortable after the AirPods come out. If your ears ring or everything sounds muffled, the session was too loud or too long.