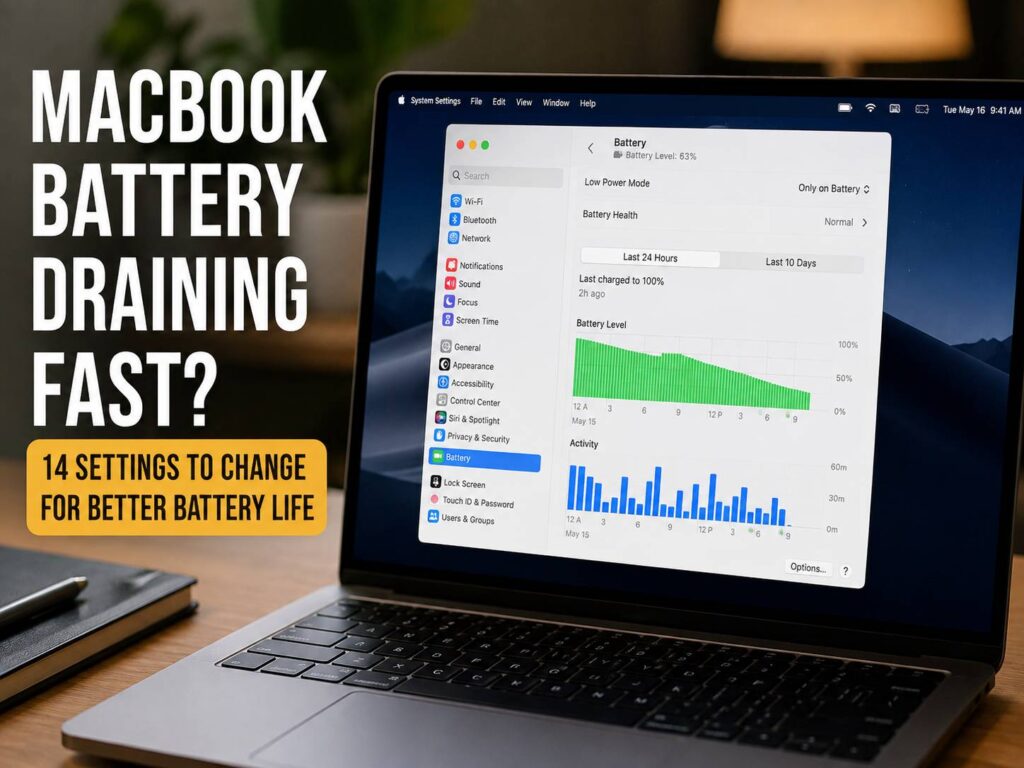
A MacBook battery draining fast can turn a laptop you normally trust into something you keep checking every few minutes. One moment you have plenty of charge. A couple of hours later, the percentage is far lower than expected.
Sometimes the battery itself is getting old. Still, that is not always the cause. Display brightness, background apps, network activity, video streaming, sleep behavior, external devices, and macOS power settings can all shorten battery life.
So, before you start thinking about a battery replacement, it makes sense to check a few settings first.
Some changes on this list can make a noticeable difference right away. Others help more during travel or long work sessions away from a charger. Your MacBook model and macOS version matter too, so you may not see every option listed below.
Here are the 14 settings I would check first on a MacBook Air or MacBook Pro that seems to be losing battery too quickly.
Check What Is Draining Your MacBook Battery First
Before changing settings at random, take a minute to see where the power is going.
Open:
Apple menu > System Settings > Battery
macOS shows recent battery activity, including screen usage and energy use. Look for periods where battery consumption suddenly jumps.
Next, open:
Applications > Utilities > Activity Monitor > Energy
This is one of the most useful places to look if your MacBook battery suddenly started draining faster than usual.
Pay attention to:
- Energy Impact
- 12 hr Power
- Apps preventing sleep
- Apps with unusually high energy use
For example, a browser with many active tabs can use much more energy than expected. Video conferencing apps, cloud sync services, photo editors, development tools, games, and media apps can do the same.
In fact, a healthy MacBook battery can still drain quickly if the CPU or GPU stays busy for long periods.
So, check Activity Monitor first. It can save you from changing ten settings when one badly behaved app is the real problem.
1. Turn On Low Power Mode
Low Power Mode is one of the easiest changes you can make.
Go to:
System Settings > Battery > Low Power Mode
Your available choices can vary by Mac model and macOS version.
You may see options such as:
- Never
- Always
- Only on Battery
- Only on Power Adapter
For most people, Only on Battery is the best place to start.
Low Power Mode reduces energy use and gives battery life priority over maximum performance. Everyday tasks still feel normal in most cases. Browsing, writing, email, spreadsheets, messaging, and streaming usually work without any obvious problem.
For that reason, I tend to leave it enabled whenever I am away from a charger for several hours.
You can always turn it off later if you start editing large videos or doing another demanding task.
2. Avoid High Power Mode on Battery
Some MacBook Pro models support different energy modes.
Open:
System Settings > Battery
Then look for Energy Mode.
Depending on the model, you may see:
- Low Power
- Automatic
- High Power
High Power Mode is designed for sustained workloads where performance matters more than battery life.
That can be useful for video work or other demanding jobs. Yet it makes little sense when your main goal is to keep the MacBook running longer.
Instead, use Automatic for everyday work. Switch to Low Power when battery life matters more than peak speed.
It is a small setting, but it can explain why one MacBook Pro seems to drain much faster than another during similar tasks.
3. Lower the Display Brightness
The display can consume a large share of your MacBook’s power.
So, if your brightness is close to maximum all day, lower it a few steps.
You can use the brightness keys on the keyboard or open:
System Settings > Displays
You do not need to make the screen dim or uncomfortable. A moderate level is usually fine indoors.
For example, full brightness can make sense next to a sunny window. The same level is often unnecessary in an office or living room.
After that, raise it again only when you actually need it.
This matters even more on MacBook Pro models with very bright displays. Running the screen brighter than necessary simply uses extra power.
4. Turn On Slightly Dim the Display on Battery
macOS includes another display setting that is easy to overlook.
Go to:
System Settings > Battery > Options
Find:
Slightly dim the display on battery
Turn it on.
Your MacBook will reduce the display brightness a little whenever you unplug the charger.
The difference is often small enough that you barely notice it. Still, the Mac is using less power without asking you to change brightness manually every time.
For most users, I see no real downside to leaving this setting active.
5. Use Automatic Display Brightness
Your MacBook can adjust screen brightness based on the light around you.
Open:
System Settings > Displays
Then enable automatic brightness if your Mac supports it.
This works well if you move between different rooms during the day.
For example, your screen does not need the same brightness in a dark room that it needs beside a window. Automatic brightness handles that without much effort.
You can still change the brightness manually at any time.
So, if you regularly forget to lower the screen brightness, this setting is worth using.
6. Make the Display Turn Off Sooner
A MacBook sitting unused with the display still on continues to use power.
Go to:
System Settings > Lock Screen
Then find:
Turn display off on battery when inactive
A setting of 2 or 5 minutes works well.
Of course, a longer delay can make sense if you often read long documents without touching the keyboard. For typical office work, though, 15 or 30 minutes is usually longer than necessary.
This change is especially useful if you often get up from your desk and leave the MacBook open.
Over an entire workday, those unused minutes can add up.
7. Reduce Keyboard Backlight Brightness
The keyboard backlight is handy at night. In a bright room, though, you may barely need it.
Open:
System Settings > Keyboard
Lower the Keyboard brightness setting.
Then set the keyboard backlight to turn off after a short period of inactivity.
You can turn it off completely during the day if the keys are easy to see.
This will not suddenly add hours of battery life. Still, it cuts one more source of unnecessary power use.
That is really the theme of good battery management. Several small changes together often matter more than one dramatic tweak.
8. Turn On Battery-Friendly Video Streaming
Video streaming can be surprisingly demanding, especially with HDR content.
Some MacBook models include an option under:
System Settings > Battery > Options
Look for:
Optimize video streaming while on battery
Turn it on if the option appears.
This allows macOS to reduce power use during compatible video playback.
For example, you probably do not need maximum display output for a casual video during a flight or train journey.
Later, when the MacBook is connected to power, you can enjoy the full visual quality without worrying about battery life.
For people who watch a lot of Netflix, YouTube, Apple TV+, or other streaming services, this setting is worth checking.
9. Stop Unnecessary Apps Running in the Background
Background software is one of the first things I check on a Mac that suddenly seems to have poor battery life.
Open:
System Settings > General > Login Items & Extensions
Review both the apps that open at login and the apps allowed to work in the background.
Look for programs you no longer use.
Common examples include:
- Old updaters
- Cloud sync tools
- Printer utilities
- Menu bar apps
- Game launchers
- Messaging clients
- Hardware control programs
- Third-party backup tools
Do not switch off a process just because the name looks unfamiliar. Find out what it belongs to first.
Still, many Macs collect old background utilities over the years.
After removing a few unnecessary ones, battery life and general responsiveness can improve at the same time.
10. Disable Power Nap on Battery When Available
Some Mac models still provide Power Nap controls.
Open:
System Settings > Battery > Options
Power Nap lets the Mac perform certain tasks during sleep.
For example, it can check email, calendar data, and some iCloud activity.
That is convenient. Yet it means the Mac can still perform work after you close the lid.
So, if your MacBook loses too much battery overnight, this is one setting worth checking.
Set Power Nap so it does not run on battery, if your model gives you that choice.
Do not worry if the option is missing. Apple does not expose the same battery controls on every Mac generation.
11. Change Wake for Network Access
Next, look at:
System Settings > Battery > Options > Wake for network access
This setting lets a sleeping Mac wake for certain network tasks.
For a MacBook that spends most of its time as a personal laptop, constant network availability during sleep is often unnecessary.
So, limit the setting to power-adapter use if that fits your setup.
This becomes more relevant when the MacBook loses a lot of charge with the lid closed.
For example, you may close the MacBook at 80% in the evening and open it the next morning with far less battery than expected.
In that case, network wake behavior belongs on your troubleshooting list.
12. Turn On Automatic Graphics Switching on Supported Macs
Some Intel MacBook Pro models include both integrated graphics and a more powerful dedicated GPU.
Those Macs can display:
System Settings > Battery > Options > Automatic graphics switching
Turn it on when battery life is the priority.
The Mac can then choose the lower-power graphics hardware for simpler tasks.
This setting does not work the same way on Apple silicon models, so many newer MacBook owners will never see it.
Still, owners of older Intel MacBook Pro models should check it.
A dedicated GPU can use much more power than integrated graphics during light workloads.
13. Turn Off Wi-Fi During Long Offline Sessions
Wi-Fi uses some power even when you are not actively browsing.
You can turn it off from Control Center or:
System Settings > Wi-Fi
For everyday use, I would not keep switching Wi-Fi off and on. The battery savings are not worth the inconvenience.
Still, there are situations where it makes sense.
For example:
- Working offline on a flight
- Reading downloaded documents
- Editing local files
- Watching downloaded movies
- Working somewhere without usable Wi-Fi
In those cases, disabling Wi-Fi is an easy extra step.
Think of this as a travel battery tip rather than a setting you need to use every day.
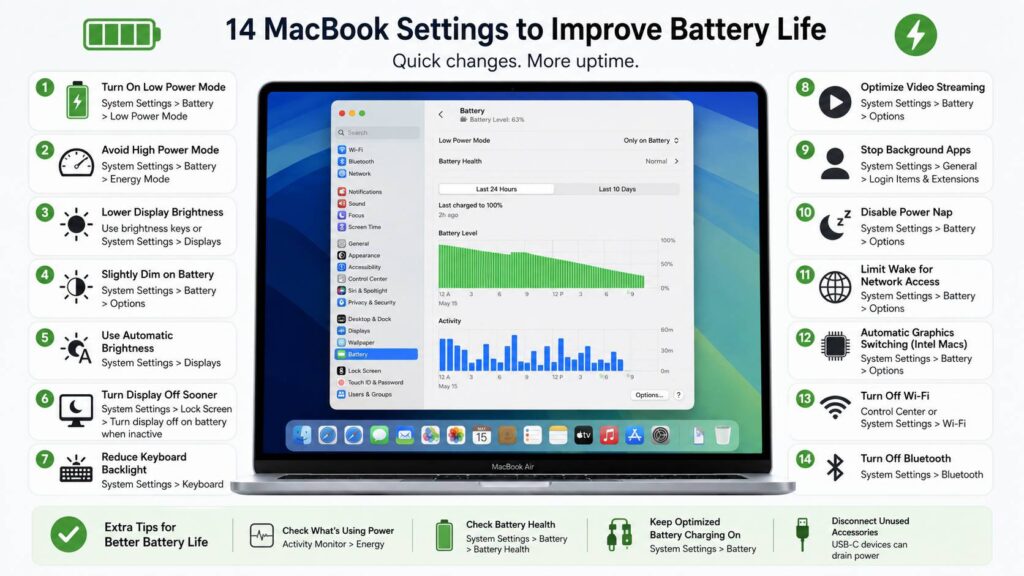
14. Turn Off Bluetooth When You Do Not Need It
Bluetooth follows the same idea.
Open:
System Settings > Bluetooth
Turn it off during long periods where you are not using Bluetooth accessories.
Keep it enabled if you rely on:
- AirPods
- Bluetooth headphones
- Wireless keyboards
- Wireless mice
- Game controllers
- Other Bluetooth devices
Again, this is not one of the biggest battery-saving changes.
Display brightness, power mode, and background apps matter more in most cases.
Still, turning off unused wireless features makes sense when every bit of battery life counts.
Check Battery Health If Your MacBook Still Drains Fast
After changing the settings above, check the battery itself.
Open:
System Settings > Battery
Look for Battery Health.
A battery in good condition normally reports Normal. You may see Service Recommended once the battery has lost substantial capacity or macOS detects a problem.
Check Maximum Capacity too if your Mac displays it.
This percentage shows how much charge the battery can hold compared with its original capacity.
For example, an older battery with reduced capacity simply cannot last as long as it did when the MacBook was new.
No software setting can restore worn lithium-ion cells.
So, if battery health has dropped a lot, treat the settings in this guide as ways to reduce waste rather than a way to rebuild lost capacity.
Keep Optimized Battery Charging Turned On
Optimized Battery Charging focuses more on long-term battery health than immediate runtime.
You can find the feature under:
System Settings > Battery
Open the charging or battery health options, depending on your macOS version.
The feature learns your charging habits. At times, the Mac can delay charging beyond 80% when it expects to remain plugged in for a long period.
A Mac sitting at 80% can look as if charging has stopped working.
In many cases, that behavior is intentional.
So, leave Optimized Battery Charging enabled for normal use.
Before travel, you can still tell the Mac to charge fully when you need the maximum available runtime.
Consider Charge Limit on Supported MacBooks
Newer Apple silicon Macs can offer a configurable charging limit on supported macOS versions.
Open:
System Settings > Battery > Charging
You may be able to choose a limit below 100%.
This setting is mainly about long-term battery health.
It does not make today’s charge last longer. In fact, starting at 80% gives you less battery available than starting at 100%.
Still, it can make sense for a MacBook that spends most of its life connected to a desk charger.
If you regularly travel, a higher limit or full charge is more practical.
So, choose the setting based on how you actually use the machine rather than copying someone else’s setup.
Close Apps With High Energy Impact
Battery settings cannot compensate for an app that keeps the processor busy.
Open:
Activity Monitor > Energy
Sort the list by Energy Impact.
Look for an app that stays near the top for long periods without a good reason.
Next, check the CPU tab.
A process using a lot of CPU time can drain the battery quickly and make the MacBook run warm.
Browsers deserve special attention here.
For example, one badly coded website can use more energy than dozens of normal tabs. Video ads, browser games, live dashboards, video calls, and pages that constantly refresh can all push power use higher.
Close the problem tab or quit the app.
Then reopen it and see if the behavior returns.
Disconnect Accessories You Are Not Using
External accessories can draw power directly from the MacBook.
That includes:
- External SSDs
- USB hard drives
- Capture devices
- USB-C hubs
- Card readers
- Phones
- Webcams
- Portable monitors
For example, charging your phone from the MacBook means the MacBook battery is powering two devices.
Portable displays can have an even bigger effect.
So, test your battery life with unnecessary accessories unplugged.
External monitors deserve a separate mention. They can affect power use, display behavior, and your available port setup. If you regularly work with docks or several screens, our guide to MacBook external monitor limits in 2026 explains what different MacBook models can handle.
Why Is My MacBook Battery Draining Overnight?
Heavy battery drain during sleep needs a slightly different check.
Start with these steps:
- Install current macOS updates
- Review Wake for Network Access
- Review Power Nap
- Check background apps
- Disconnect USB-C devices
- Restart the Mac
- Check Activity Monitor after waking
- Review Battery usage history
A small battery drop during sleep is normal.
Still, losing a large chunk of charge every night points to something worth investigating.
For example, losing 3% overnight is very different from opening the MacBook in the morning and finding that 30% or 40% has disappeared.
Repeated heavy sleep drain can point to background activity, attached hardware, software problems, or an aging battery.
Why Is My New MacBook Battery Draining So Fast?
A brand-new MacBook can use more power during its first hours or days.
During setup, macOS can be busy with tasks such as:
- Downloading iCloud files
- Syncing photos
- Indexing files
- Installing apps
- Downloading updates
- Syncing cloud storage
- Processing a photo library
These jobs can keep the processor active in the background.
So, check Activity Monitor before deciding that the new battery has a problem.
After the initial setup work finishes, battery use often becomes easier to judge.
Then you can compare performance during your normal daily routine.
Which MacBook Battery Settings Make the Biggest Difference?
You do not need to change every setting on this list.
If you want the biggest gains first, I would start here:
- Turn on Low Power Mode.
- Lower display brightness.
- Reduce the display-off timer.
- Remove unnecessary background apps.
- Avoid High Power Mode on battery.
- Check Activity Monitor for heavy energy users.
These changes target some of the most common sources of battery drain.
After that, look at keyboard lighting, wireless radios, sleep settings, and external accessories.
The goal is not to strip away every feature just to squeeze out a little extra runtime.
Instead, remove the power use that adds little value to your day.
What to Do If Battery Life Still Does Not Improve
Settings cannot fix every MacBook battery problem.
Check Battery Health and Maximum Capacity again.
Then install current macOS updates and disconnect external accessories.
After that, test the MacBook during a simple workload.
Try browsing the web at moderate brightness with no demanding apps running.
If the battery still drops very quickly, the problem may be related to battery wear or hardware rather than your settings.
Age matters here.
MacBook batteries are consumable parts. Their ability to hold a charge decreases over time.
So, a MacBook that once lasted a full workday can eventually need charging much sooner, even if you use it in exactly the same way.
At that point, another macOS tweak will not restore the battery’s original physical capacity.
Final Thoughts
A MacBook battery draining fast does not automatically mean the battery needs replacing.
Start with Low Power Mode, display brightness, the screen timeout, background apps, and Energy Mode.
Then check sleep settings, Activity Monitor, wireless features, and connected accessories.
The surprising part is that one app or browser tab can cause more battery drain than several macOS settings combined.
So, do not focus only on battery percentages.
Look at what the MacBook is actually doing.
A few sensible changes can make battery life more predictable without turning off every useful feature on the machine.